
LineUpr integration
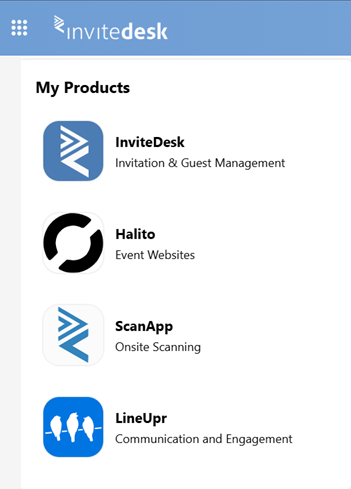
Use our on-site event app integrated with InviteDesk. You can access LineUpr by clicking on the Grid icon in the top-left corner of your screen:
On this page:
You can connect or synchronise your InviteDesk event with your LineUpr app. If you want to know more about how to manage a LineUpr event, click here. If you cannot access LineUpr via the Grid icon, you will need to contact your InviteDesk contact or create a ticket via our Support Helpdesk, because this is a paid feature in InviteDesk.
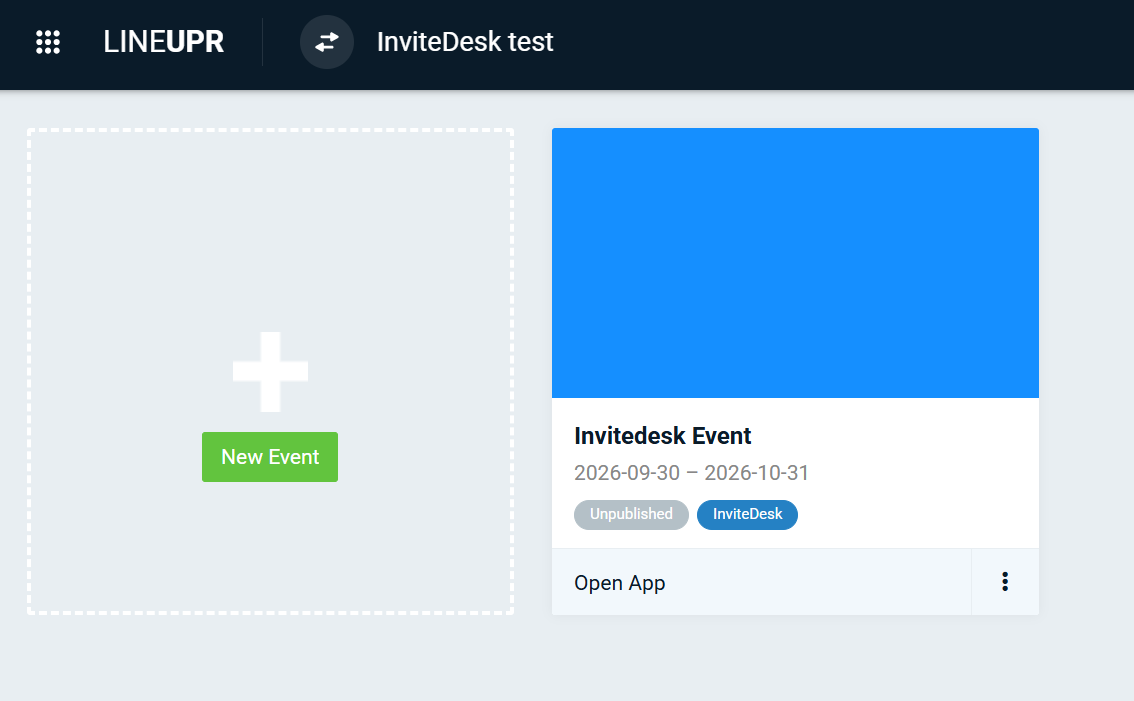
Once opened, you will see an overview of all events in your LineUpr account, and you can select the event you want to work on or create a new one. By clicking on the arrows symbol in the top bar you can switch between different tenants/organisations you are added to as a user. The blue InviteDesk badge under the event name indicates synchronisation with InviteDesk.
How to sync LineUpr with your event
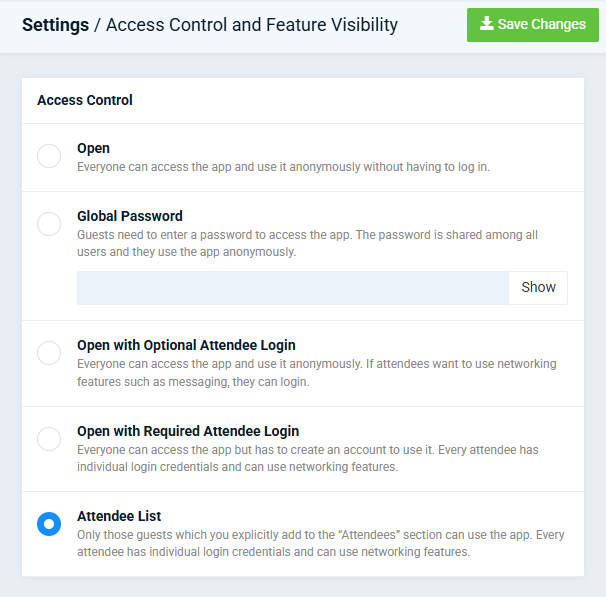
Automatic synchronisation of data is included in the platinum LineUpr plan. This plan allows you to set up a predefined attendee list for your LineUpr app. If you don't want to restrict who can access the app, syncing attendees is not necessary and you only need to share the link to the LineUpr app with your guests.
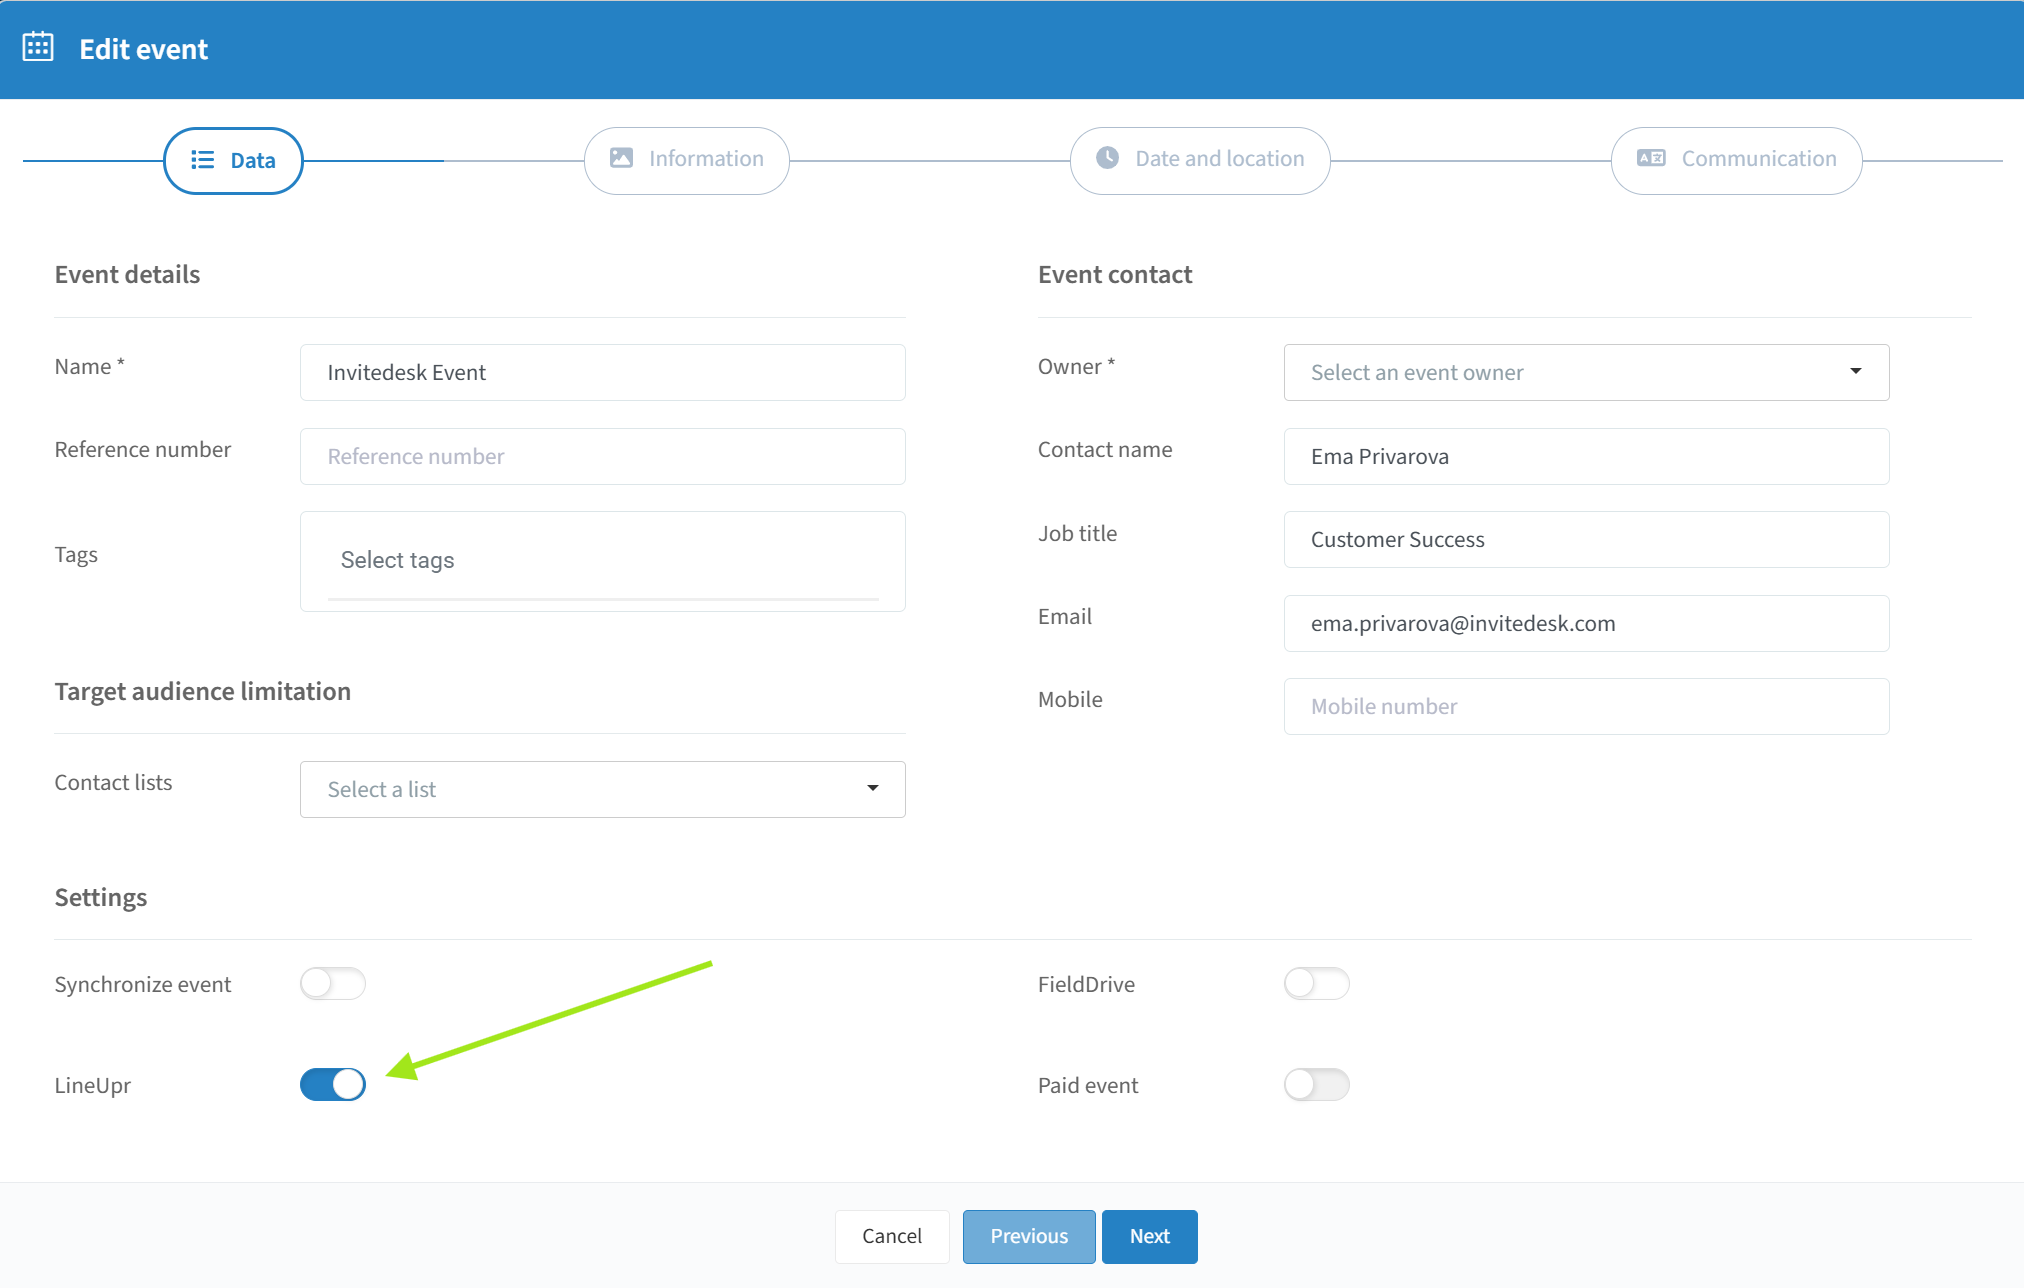
While creating/editing an event in InviteDesk, you can turn on the slider for LineUpr. This will create a synchronised event there as well, with all registered guests and their registration details automatically included.
Note: This slider can only be turned on if you have an activated integration with LineUpr for your environment.
Synchronised attendee data
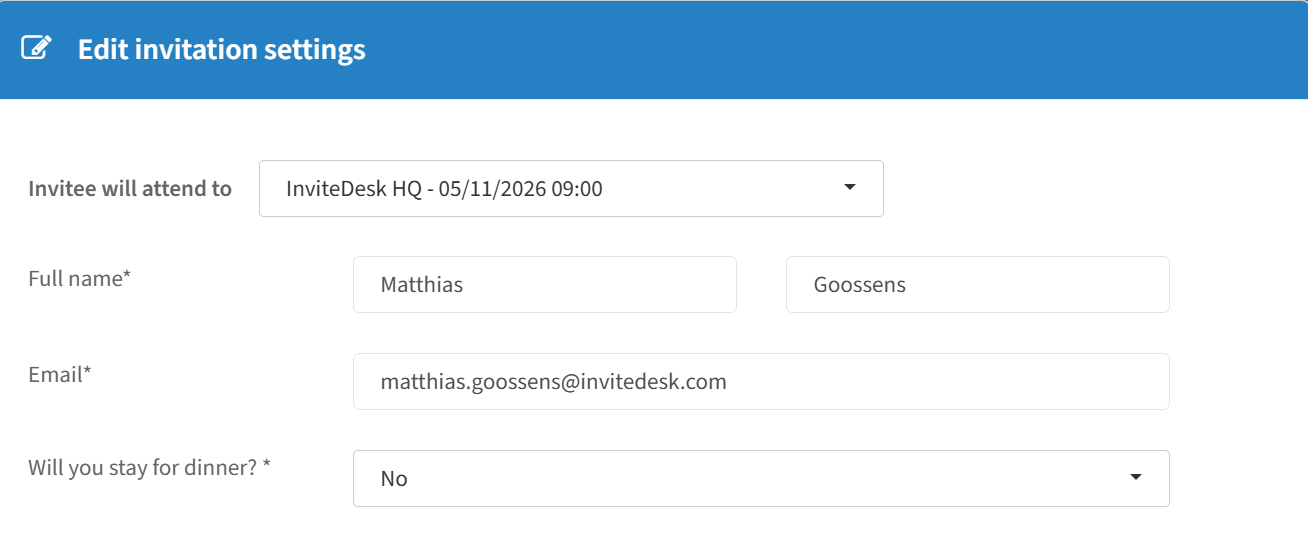
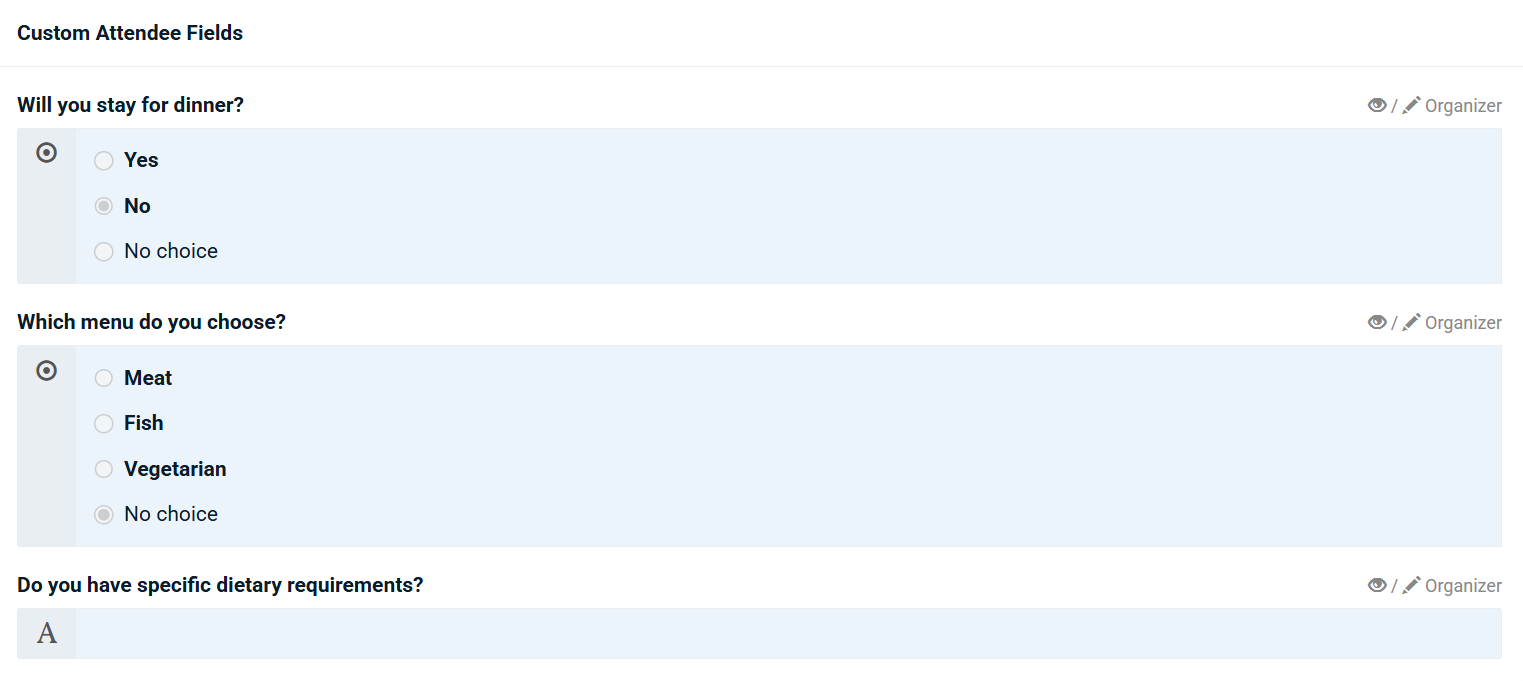
The synchronisation means that the guest list (attendee list) is kept in sync between the event and LineUpr. Once a guest registers via an InviteDesk registration page, an attendee will be created in the LineUpr app as well. The registration data will also be transferred to LineUpr in the form of custom attendee fields.
Note: For the synchronisation with LineUpr to work correctly, each guest has to have a unique email address.
Example of attendee details in InviteDesk:
Example of the same attendee details in LineUpr:
Note: You can have your guests sign up for workshops via InviteDesk and then upload the attendee lists to each workshop in LineUpr via an Excel file (see "Workshop Page" on the Paid features page).
How do InviteDesk guests log in to LineUpr
With an active sync between the apps, after a guest registers, a profile in LineUpr is automatically created with their email, name, and registration details. In order to access this account, you need to publish your LineUpr event and share a link to this event with your attendees. After the attendees click on this link, they will need to set a password for their LineUpr account.
If your data isn't synced, no guest profiles are created in advance. You only need to share the app link, and depending on your access control settings, guests may need to create an account.
You currently have three options for sharing a link to the LineUpr event in your email communications:
Using the variable #LineUprAppUrl
Adding a button
Adding a QR code
When guests click on any of these links or scan the QR code, they will have the option to create an account. Their email address must match the one they used to register in InviteDesk, so their registration will be linked to the profile that has already been created for them.
How to add a button leading to LineUpr
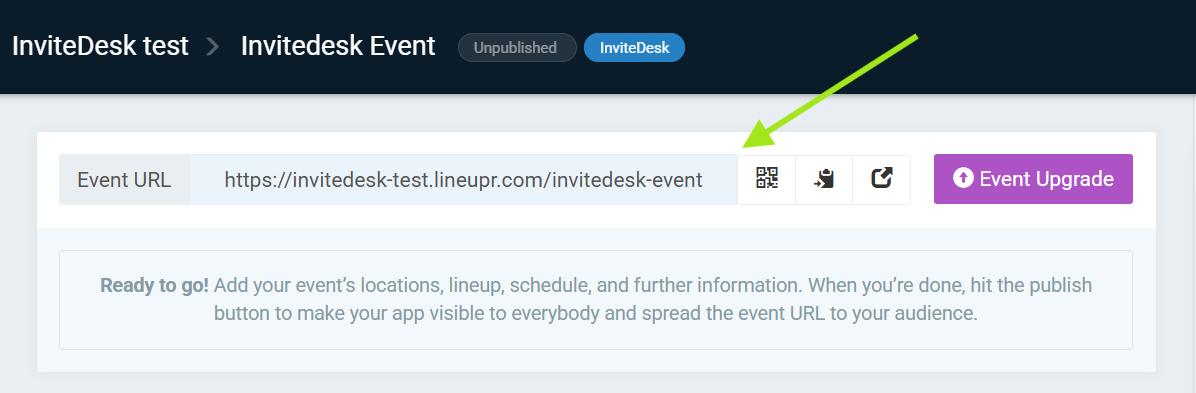
First, copy the link from your LineUpr apps dashboard.
In your email editor, click the plus sign to create a button.
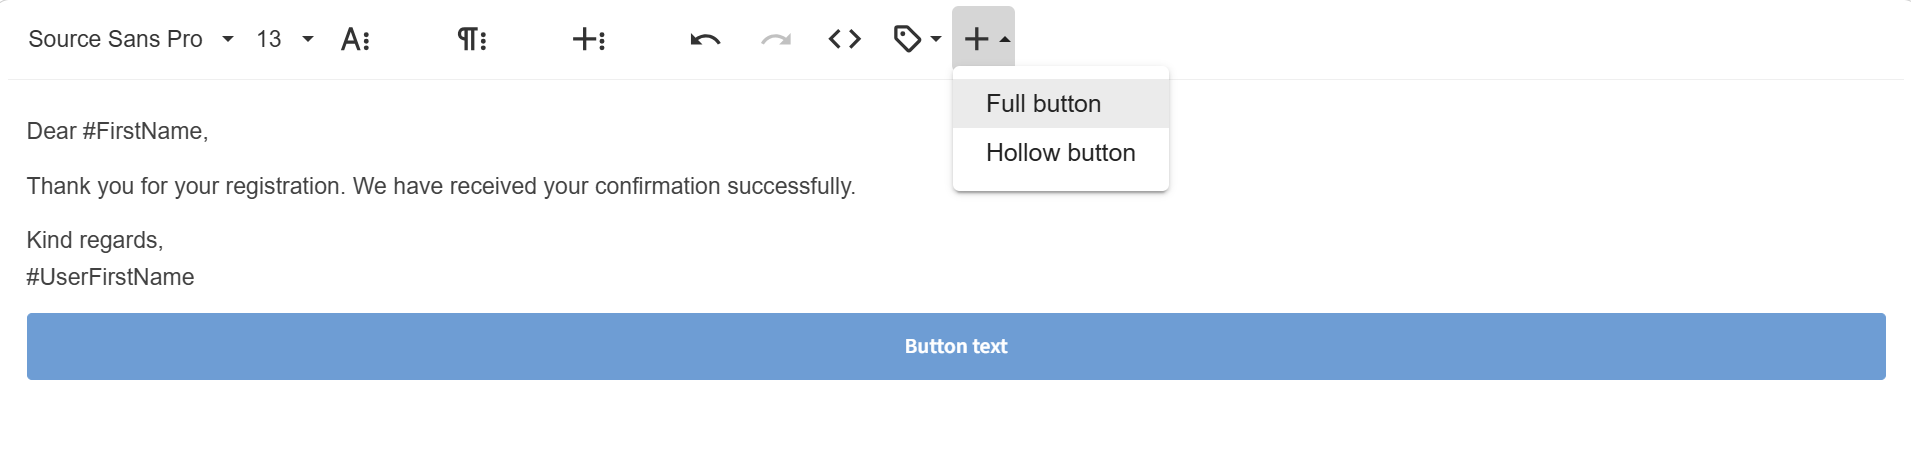
Adjust the URL and button text to match the LineUpr link.

How to add a QR code leading to LineUpr
First, copy the QR code from your LineUpr apps dashboard. Then place it in your email communication.
How to add Invitedesk QR tickets to LineUpr
You can place automatically generated InviteDesk QR codes in the LineUpr menu, allowing guests to access all event information in Lineupr.
Usually, not all necessary features in LineUpr are enabled in your app. Please contact support@invitedesk.com before proceeding so we can enable them.
The current workflow is as follows:
First, ensure automatic assignment of QR code tickets to your guests in InviteDesk is enabled in the Tickets or Date & Location section. This function does not support PDF tickets.
Export the attendee list with at least first name, last name, email, and QR code content to regenerate a QR code in LineUpr. You may export additional information, but ensure you create corresponding attendee fields in LineUpr before importing.
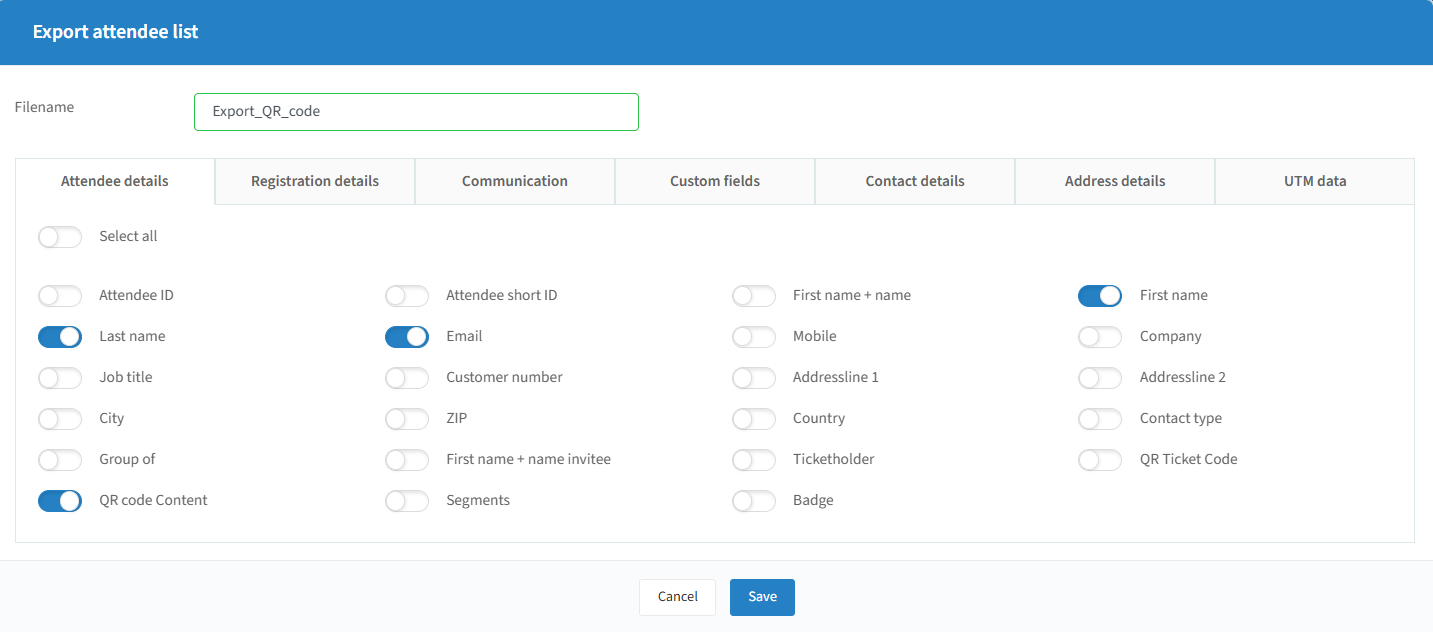
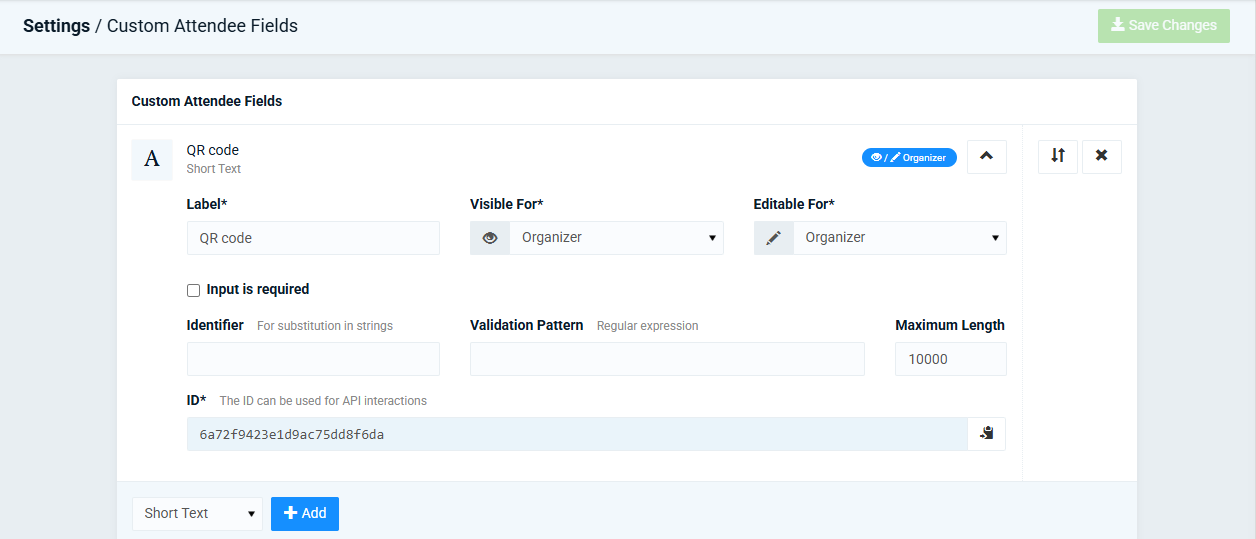
Create a custom attendee field for your QR code content in LineUpr by navigating to Settings → Attendee Contact Fields. Upload your QR code content here. Copy the automatically generated attendee field ID for later use.
After creating this field, go to the attendee list and select Import Attendee List:
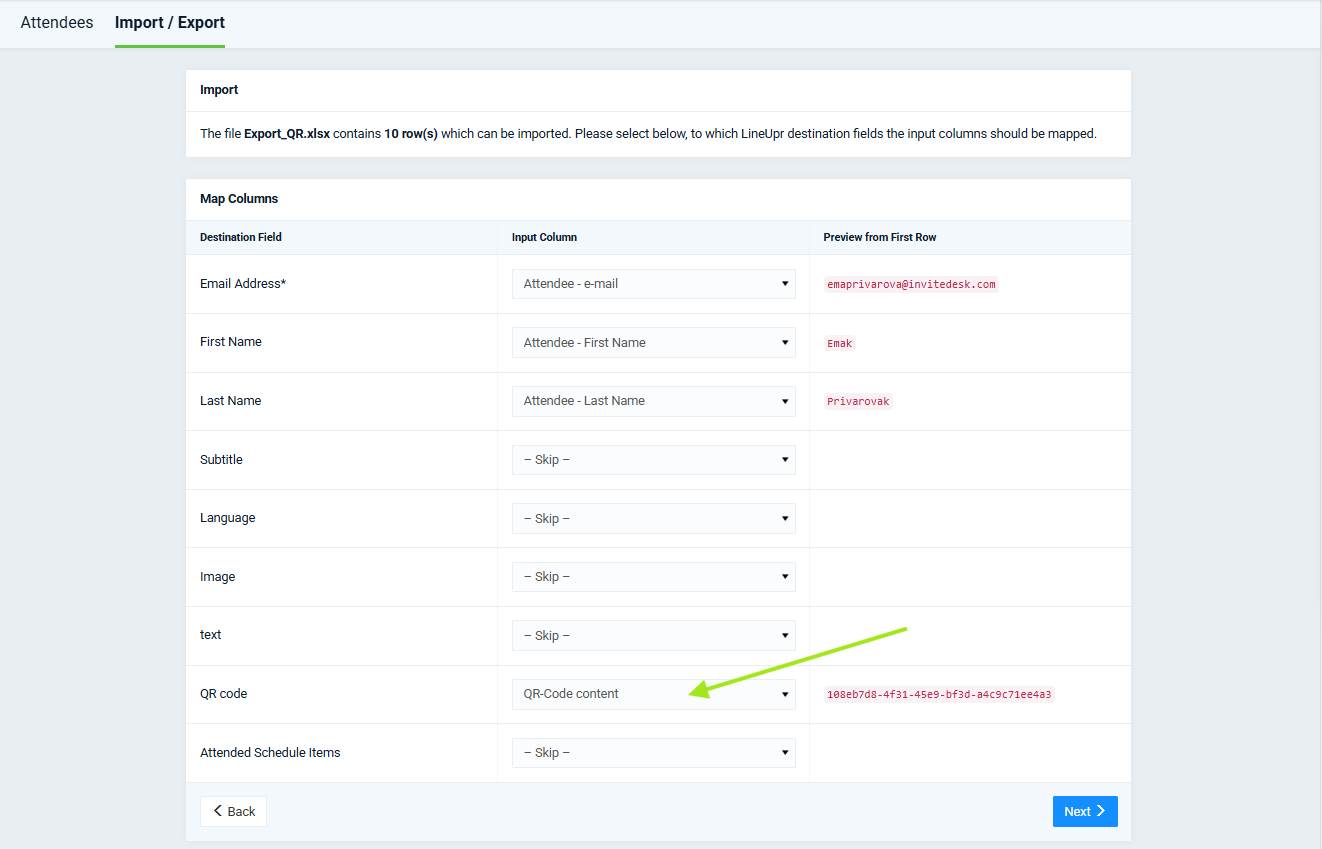
Once you complete the upload, create a menu item that automatically generates a QR code from the QR code content.
Go to Settings → Menu and create a QR code item.
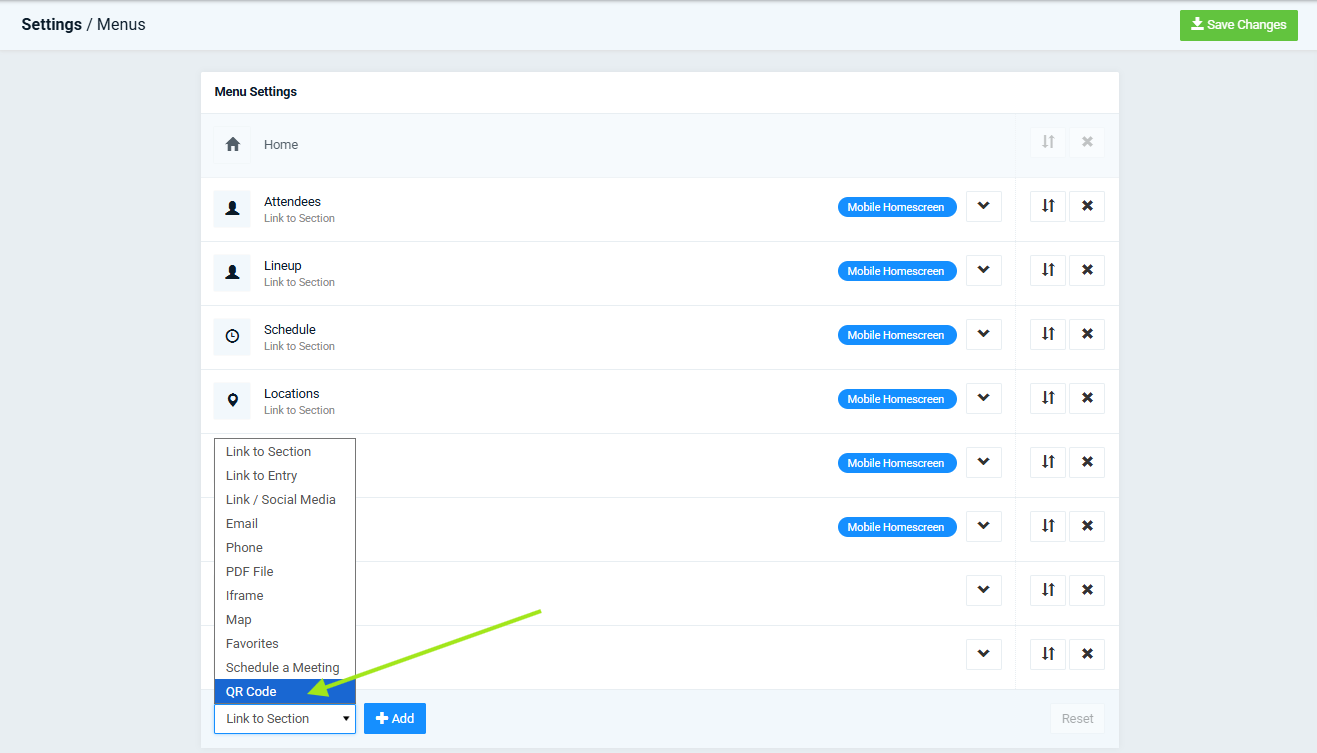
In the first field on the left enter the following script and add your pasted Attendee Field ID: {attendee.customFields.ID_COPIED_IN_PREVIOUS_STEP}, e.g. {attendee.customFields.689b2c06c114f8a6a3ea005b}. This will add a template which will dynamically be replaced by the corresponding attendee-specific custom field.
To show the QR code on the app’s home screen enable “Show on mobile homescreen”. Save the changes.

After completing all steps, the ticket appears as a menu item. Clicking it shows your event QR code ticket directly:
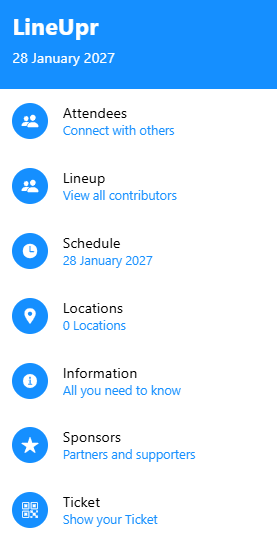 | 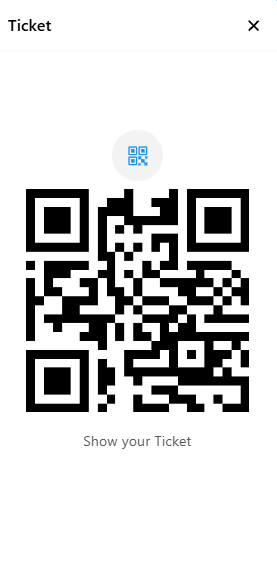 |
How to import guests' workshop selections into LineUpr
If your guests chose their workshops during registration in InviteDesk, you can carry those selections over into LineUpr so they're already assigned to the correct agenda items and the guests won't need to select their workshops again in the LineUpr app.
Note: Importing workshop selections currently requires a manual import. This is not supported through automatic LineUpr synchronisation.
Before importing, check whether all the custom attendee fields you need already exist in LineUpr. If not, create them first, then run the import.
You also have to set up a closed guest list for the events you want to import a guest list to:
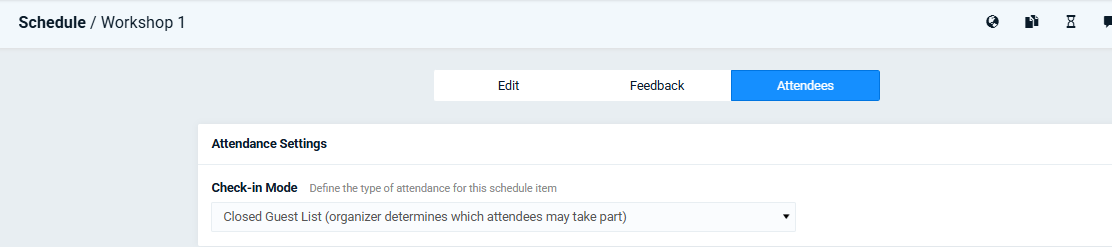
The current workflow:
Add a column per workshop. In your Excel Attendee list export file, add a separate column for each workshop, using the workshop name as the column header.
Fill in the workshop slug for each guest. In each workshop column, enter the slug of the workshop if the guest selected this workshop.
The slug is the last part of the workshop's URL in LineUpr, after the final /. For example, in this URL:https://manager.lineupr.com/knb/edit/invitedesk/plenaire-sessies the slug is plenaire-sessies.
Example: all three guests attend the plenary session, but only one of them also selected Workshop 1.

Map the columns to Agenda items during import. When importing the file into LineUpr, map each workshop column to the Schedule items field. After mapping the first one, LineUpr will show additional fields so you can map multiple workshops per guest.
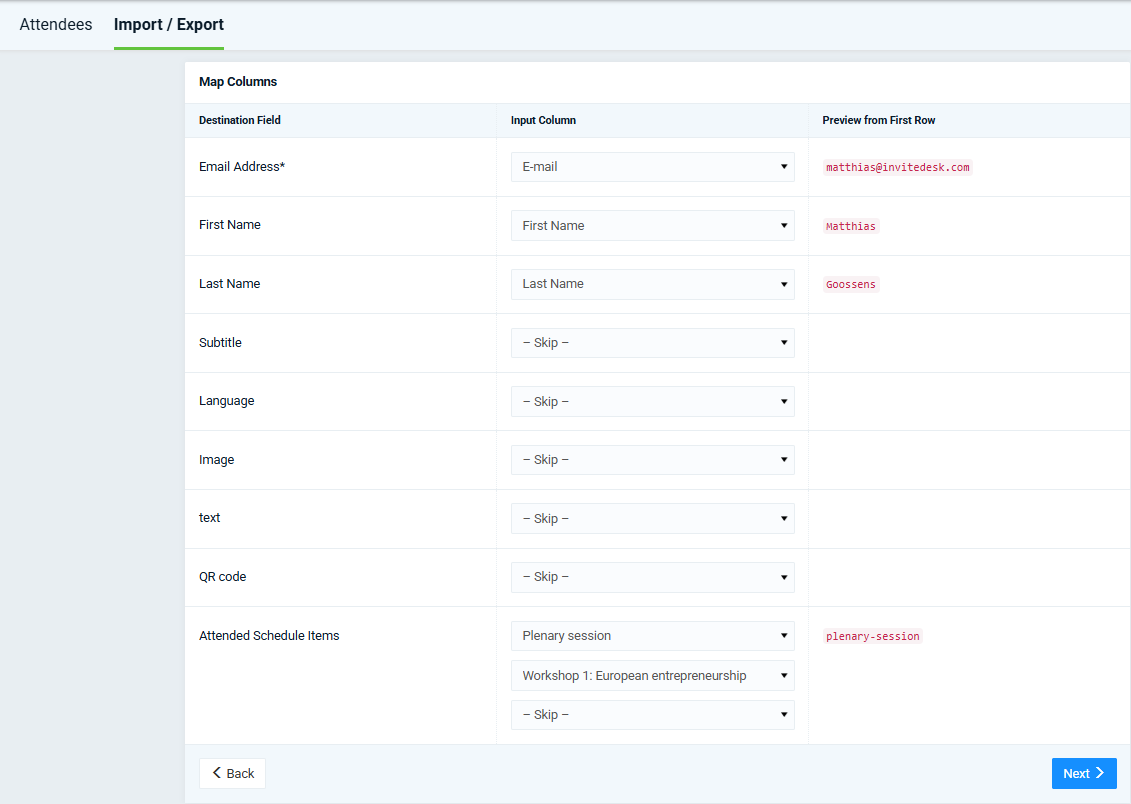
Once imported, each LineUpr guest will already see the the workshops they selected in InviteDesk in their personal LineUpr Schedule.