Library
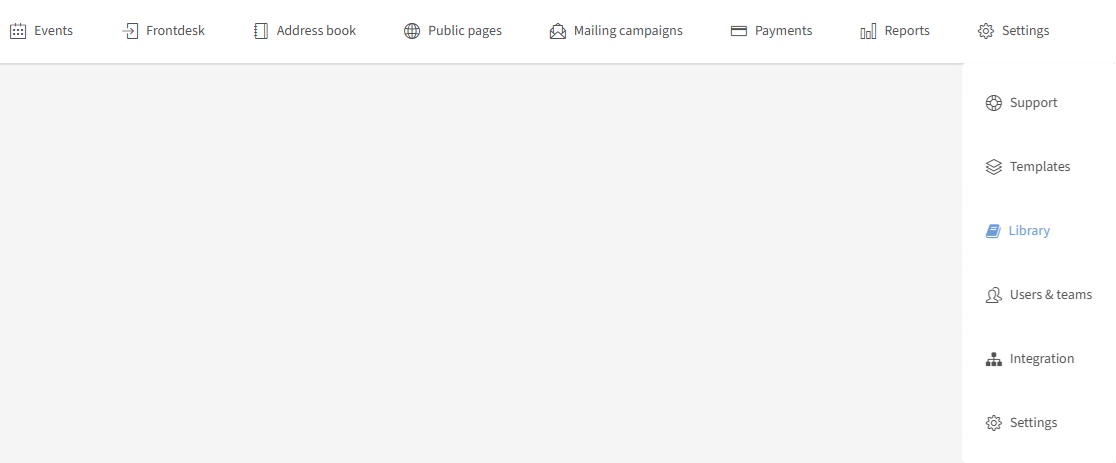
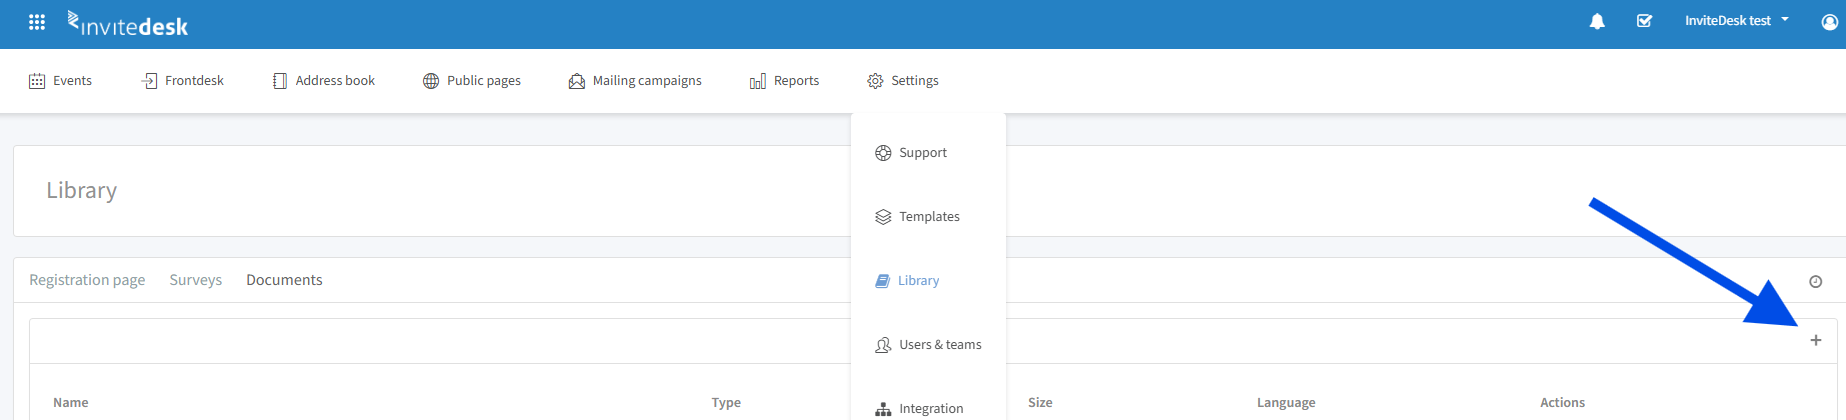
Predefined questions, questionnaires and documents. You can find the Library section on the top bar in the dropdown menu of the "Settings" tab:
On this page:
Registration page
Registration page: Create a predefined question
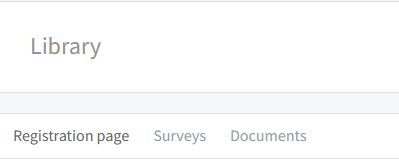
In this section, we will talk about adding predefined questions to the registration page library. Questions you are likely to use on various occasions for different events are best created in this section. If for one or another event you want to ask something very specific, this is best done on an event level.
Create a predefined question in the library
To create a new predefined question for the registration page, click on the "+" sign on the right-hand side:
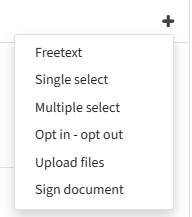
You will have the following possibilities:
The "Free text" type of question.
The "Multiple choice - single select" type of question where only 1 answer can be selected by the person who completes the survey.
The "Multiple choice - multiple select" type of question where multiple answers can be selected by the person who completes the survey.
The "Opt in - opt out" type of question where a checkbox can be checked or unchecked.
The "Upload files" type of question where a file can be uploaded.
The "Sign document" type of question where a document can be signed (see "Create a signature" below).
Add a predefined question to the registration page
Once you've created a question in the library, you can easily add this question on the registration page of an event. If you click on "Add a question" in the registration page, a dropdown menu will appear with a section "From library" where you can select your predefined question.

Add a registration page question to the library
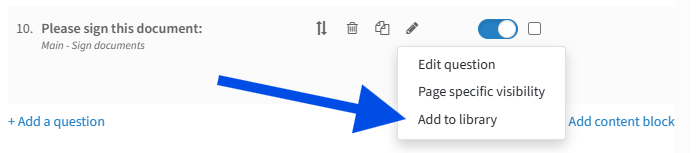
If you've created a new question on the registration page of an event and you think that you might use this question for other events too, you can also quickly add it to the library by clicking on the crayon and "Add to library".
Surveys
Survey: Create a predefined question
InviteDesk offers an integrated solution, not only to track event satisfaction, but also to gather the preferences of your invitees at different touch points. You can send surveys after an event but also in case people decline your invitation or are too late to register.
This way we enable you to gain insight into the quality and perception of your events, and to better match your event offering to your audience in the future. In order to be consistent and to make results comparable over time and across events we created a centrally managed survey section.
Here you can create your own set of predefined questions and questionnaires which you can reuse on an event level. On an event level, you can reuse the predefined questions and questionnaires, and if wanted add event-specific questions (see the Surveys page for the event survey sections).
In this section, we will talk about adding predefined questions to the surveys library. These help you to remain consistent across surveys for different events so over time you can track and compare results. Questions you are likely to use on various occasions for different events are best created in this section. If for one or another event you want to ask something very specific, this is best done on an event level.
To create a new predefined question, click on the "+" sign on the right-hand side:
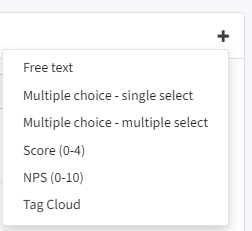
You will have the following possibilities:
The "Free text" type of question.
The "Multiple choice - single select" type of question where only 1 answer can be selected by the person who completes the survey.
The "Multiple choice - multiple select" type of question where multiple answers can be selected by the person who completes the survey.
The "Score (0-4)" type of question. Simply define the text of the question and the text labels of the highest and the lowest value.
The "NPS (0-10)" type of question. Simply define the text of the question and the text labels of the highest and the lowest value.
The "Tag cloud" type of question. You can select tags you would like to make available to your respondents — simply click the tags to make them available. On an event level, you decide to store these tags for your contacts in the address book. This way you are sure that, for future events, you can target even better. It will look like this when you have a tag cloud question on event level:

Tags can be created in your company profile (see the Tags page).
Predefined questions: Filters & actions
In this section, we will talk about the several filters you can apply and which actions you can perform in the predefined questions section.

Filters
You can apply the following filters:
Filter on type: you can filter on the type of question: Free text, Multiple choice - single select, Multiple choice - multiple select, Score (0-4), NPS (0-10), or Tag cloud.
Filter on active/inactive questions: you can filter on questions that are active or questions that are inactive.
Actions
You can do the following actions:
Search for questions: in this free text field, you can search for a question by typing for example a word that is in the question itself.
Sorting columns: by clicking a column you can apply sorting for that specific column. By clicking it a third time, it will restore to default.
Edit question: by clicking the pencil icon, you can edit the question.
Deactivate question: by clicking the icon next to the pencil, you can deactivate the question. This will move the question to the inactive questions.
Remove question: by clicking the trashcan icon, you can remove the question. This will remove the question completely and it will also not be in the inactive questions section.
Question stats: by clicking the bar chart icon, you can view the question statistics (see "Question statistic" below).
Export: by clicking at least one checkbox on the left-hand side of your question, you can generate an export into an Excel file.
Survey: Create a predefined questionnaire
In this section, we will talk about adding predefined questionnaires. A predefined questionnaire makes it easy to add, on an event level, a series of questions in one go. The building blocks of these questionnaires are the predefined questions (see "Survey: Create a predefined question" above).
To create a new predefined questionnaire, click on the "+" sign on the right-hand side. You will see the following:
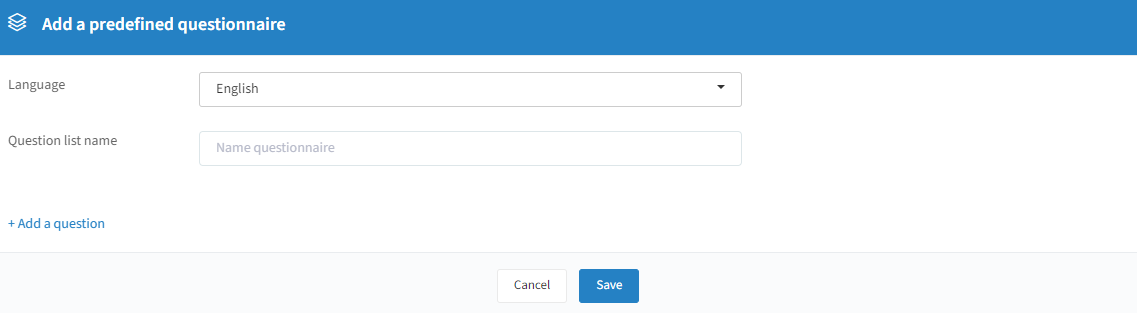
Language: choose your desired language.
Question list name: give your question list a name.
+ Add a question: here you can decide which predefined questions you want to add to this question list.
After you have added the question(s) you want, you will have the following possibilities:
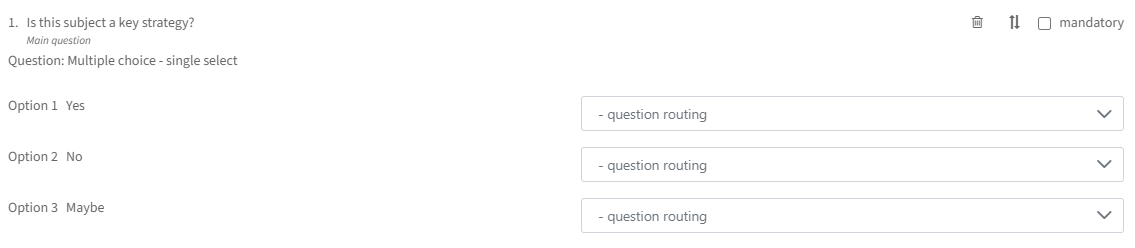
Remove question: with the trashcan icon, you can remove the question from the list.
Change order: with the two arrows icon, you can change the order of the question in the list.
Mandatory: by activating this checkbox, this question will be mandatory and will need to be answered by your contacts.
Question routing: when you have more than 1 question, you can apply routing. For example, if a contact answers "Yes" to question 1, only then show question 2.
If you have done all the necessary steps, you can click on "Save" and your predefined questionnaire will be created.
Predefined questionnaires: Filters & actions
In this section, we will talk about the several filters you can apply and which actions you can perform in the predefined questionnaires section.

Filters
You can apply the following filters:
Filter on active/inactive questionnaires: you can filter on questionnaires that are active or questionnaires that are inactive.
Actions
You can do the following actions:
Search for questionnaires: in this free text field, you can search for a questionnaire by typing for example a word that is in the questionnaire itself.
Sorting columns: by clicking a column you can apply sorting for that specific column. By clicking it a third time, it will restore to default.
Edit question list: by clicking the pencil icon, you can edit the questionnaire.
Deactivate question list: by clicking the icon next to the pencil, you can deactivate the questionnaire. This will move the questionnaire to the inactive questionnaires.
Remove question list: by clicking the trashcan icon, you can remove the questionnaire. This will remove the questionnaire completely and it will also not be in the inactive questionnaires section.
Question statistic
In this section, we will talk about how you can access the statistics of your predefined questions and how to do an export of your statistics. You can view the statistics of a predefined question by clicking on the following symbol:

Below is an example:
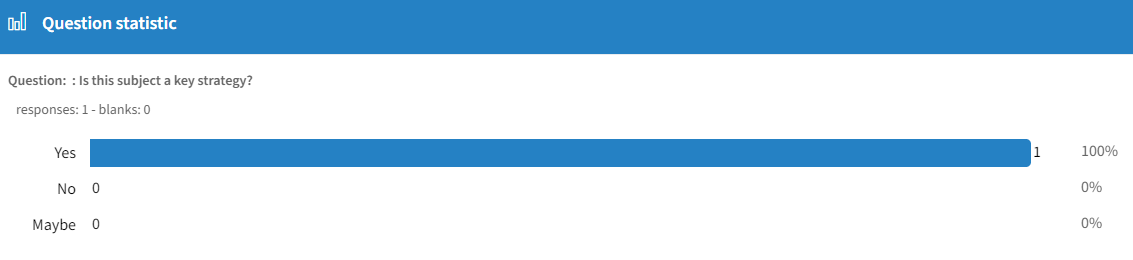
You can also select a specific question by clicking the checkbox on the left-hand side. Below is an example:

By doing so, an icon will appear where you can export the statistics into an Excel file for your desired timeframe of that question or those questions:

Documents
Create & print a badge
How to create a badge
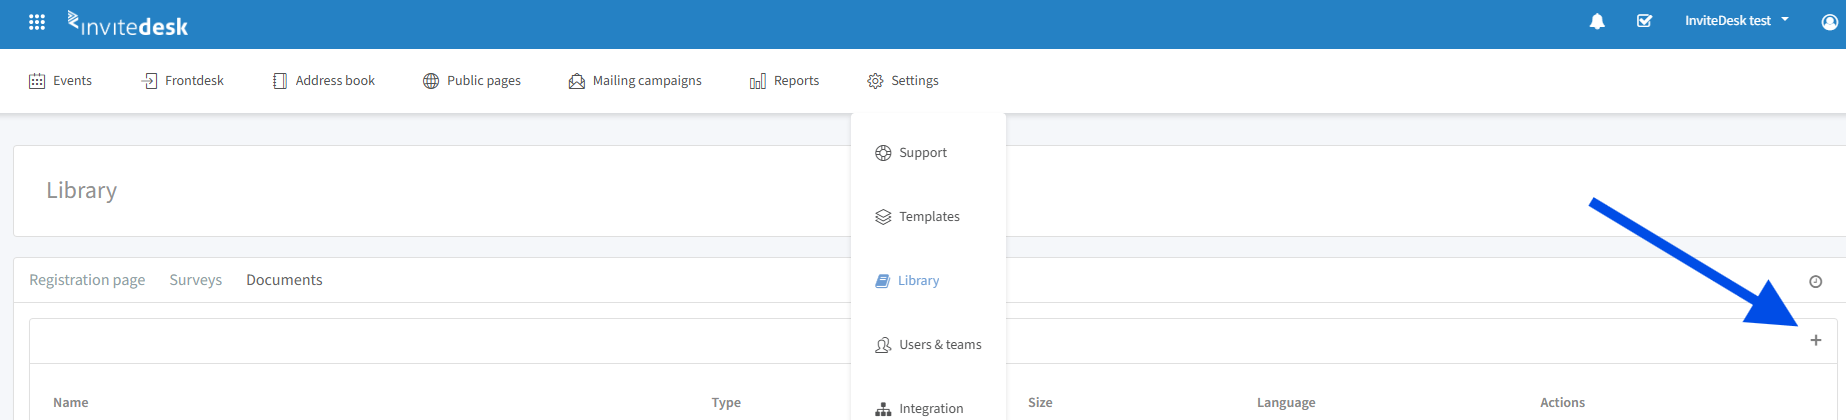
Go to Settings > Library > Documents and click on the "+" symbol to create a new document. Select as document type "Badge" and select the dimension of your badge.
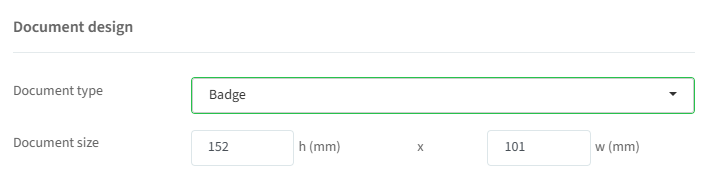
Select the different languages you want to use for the badge and select the default language that should be used when no language information is available for a guest.
Design the badge header, body and footer for all the available languages and select the height (mm) for header and footer. Choose if you want to add a QR code, a barcode, or none.
The QR code on the badge is identical to the ticket QR code and can be used for scanning for access rights at the event (specific workshops, afterparty, buffet etc.) — see "Ticket (Venue or specific access right)" on the Tickets page. For this, you have to use scanning at an access point in our Scanapp.
Attention: make sure the height of each element is higher than 0, if you want to use it, and the sum of the height of header and footer is less than the total height of the document.
Assign badges to your attendees
In the attendee list, select all guests.
Then click on the badge icon that appears at the top.
Choose one of the badges you have created.
How to activate automatic badge printing after check-in (Scanapp)
While creating a scan point (see "Scan points" on the Scanapp page), you can enable the toggle for automatic badge printing. With this function, a badge will be printed automatically on your connected printer (a pop-up window will appear) after a ticket is scanned.
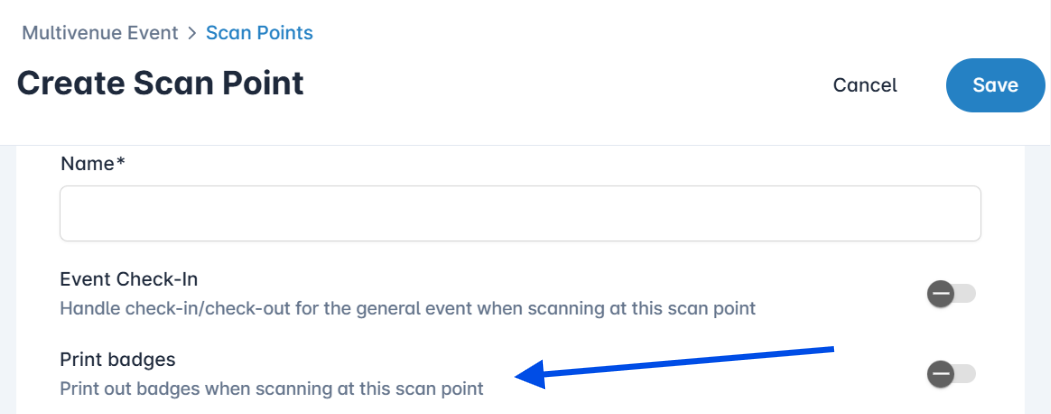
Currently, badge printing is only supported on computers, not smartphones. We recommend using either Google Chrome or Microsoft Edge as your browser.
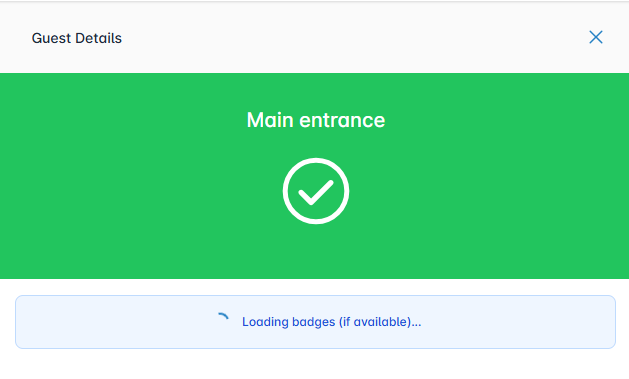
After you check a guest in via this scan point, you should shortly see the following message:
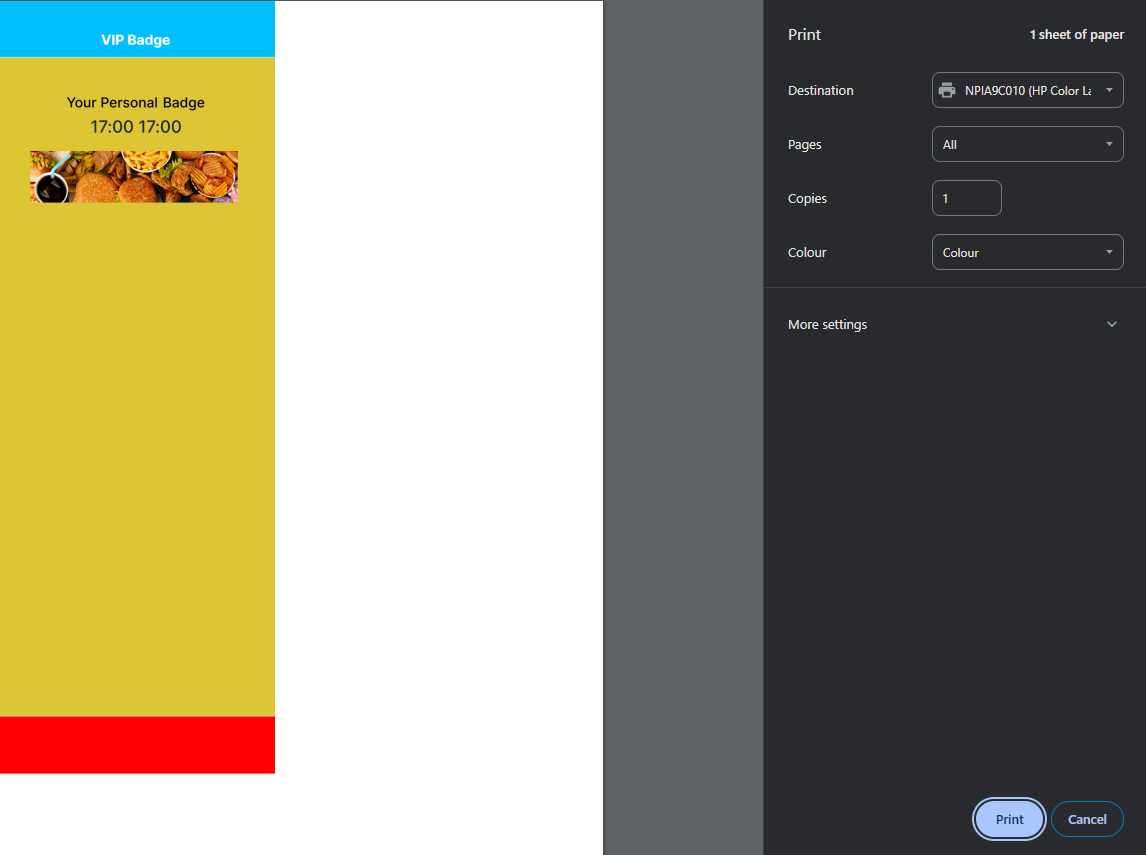
This is an example of a pop-up you will receive if badges are assigned to the guest (make sure pop-ups are allowed in your browser):
Create a certificate
How to create a certificate
Go to Settings > Library > Documents and click on the "+" symbol to create a new document.
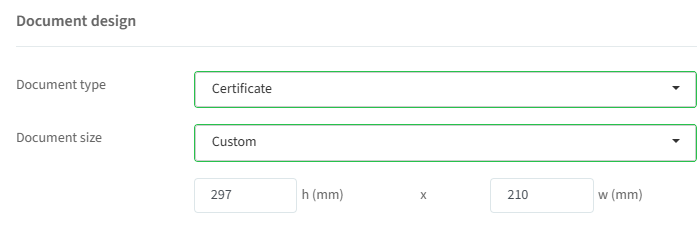
Select as document type "Certificate" and select the dimensions of your document: A4 or custom size.
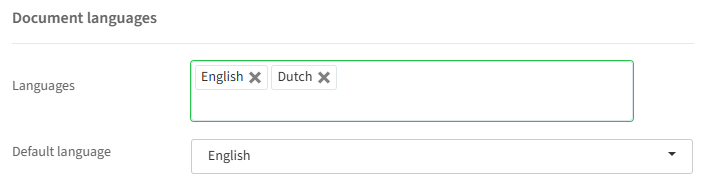
Select the different languages you want to use for the certificate and select the default language.
Design the certificate header, body and footer for all the available languages and select the height (mm) for header and footer.
Attention: make sure the height of each element is higher than 0, if you want to use it, and the sum of the height of header and footer is less than the total height of the document.
Create a signature
How to create a signature
Go to Settings > Library > Documents and click on the "+" symbol to create a new document.
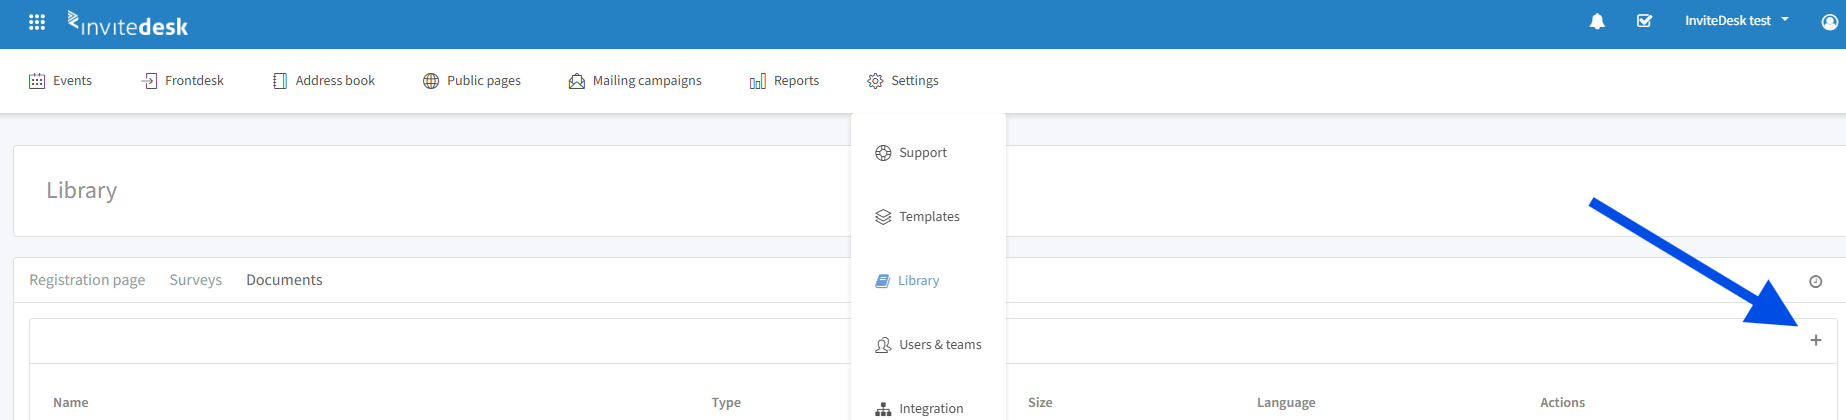
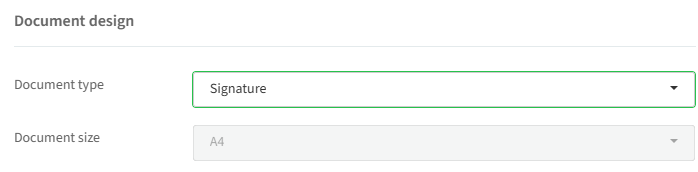
Select as document type "Signature".
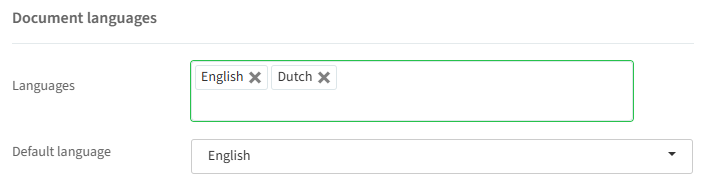
Select the different languages you want to use for the signature and select the default language.
Design the signature header, body and footer for all the available languages and select the height (mm) for header and footer.
Attention: make sure the height of each element is higher than 0, if you want to use it, and the sum of the height of header and footer is less than the total height of the document.
How to use the signature
Once you've created a signature document, you can add this as a question on the registration page of an event.
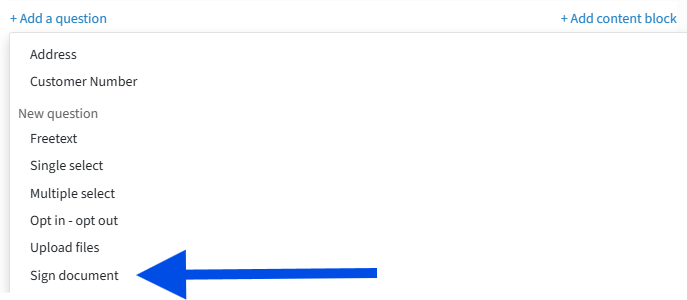

When a guest registers for the event, they can sign the document on the registration page.